Multi-OC Creation Guide: How to Keep Characters Consistent in AI Anime Videos
Introduction
Creating anime videos with multiple original characters has always been one of the hardest AI creation tasks. In many tools, characters start to blend together, lose outfit details, or drift away from their established look after just a few seconds.
AnividAI is built differently. Your saved OCs are the foundation of the workflow, so you can select them directly from your library instead of repeatedly re-uploading references or rewriting the same appearance prompts for every scene.
In this guide, we’ll walk through the best current workflow for multi-OC video creation on AnividAI, plus a preview of the upcoming Kling-o1 native OC pipeline.
Workflow 1: The Reference-First Method (Available Now)
This is the most reliable method today if you want strong control over composition, character placement, and visual consistency. The idea is simple: create a high-quality keyframe first, then use that image as the anchor for video generation.
Step 1: Select Multiple OCs and Generate a Keyframe
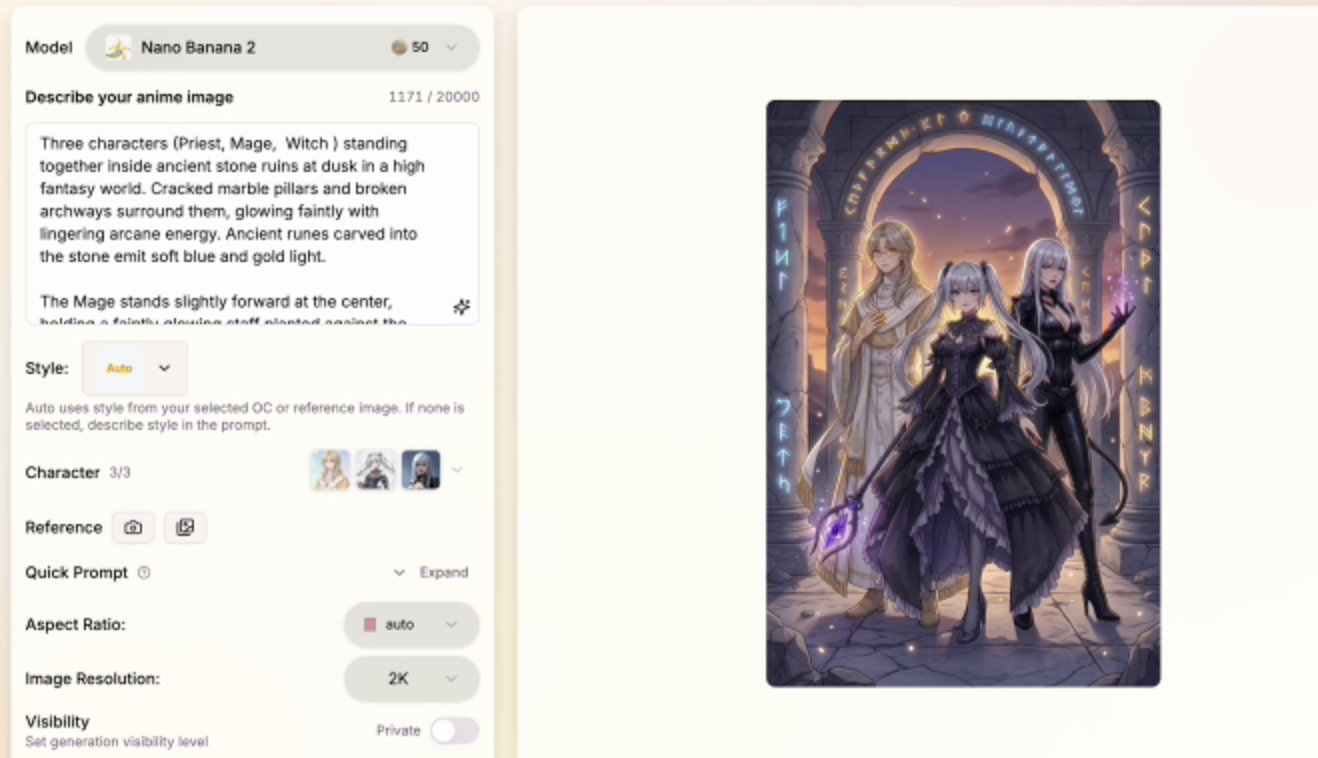
Open the Anime Generator and choose your saved characters from the character picker.
- Direct OC selection: You do not need to manually type each character's full description again.
- Subscriber benefit: Subscribers can select up to 3 OCs at the same time.
- Prompt focus: Write only the scene, interaction, and mood.
Example prompt:
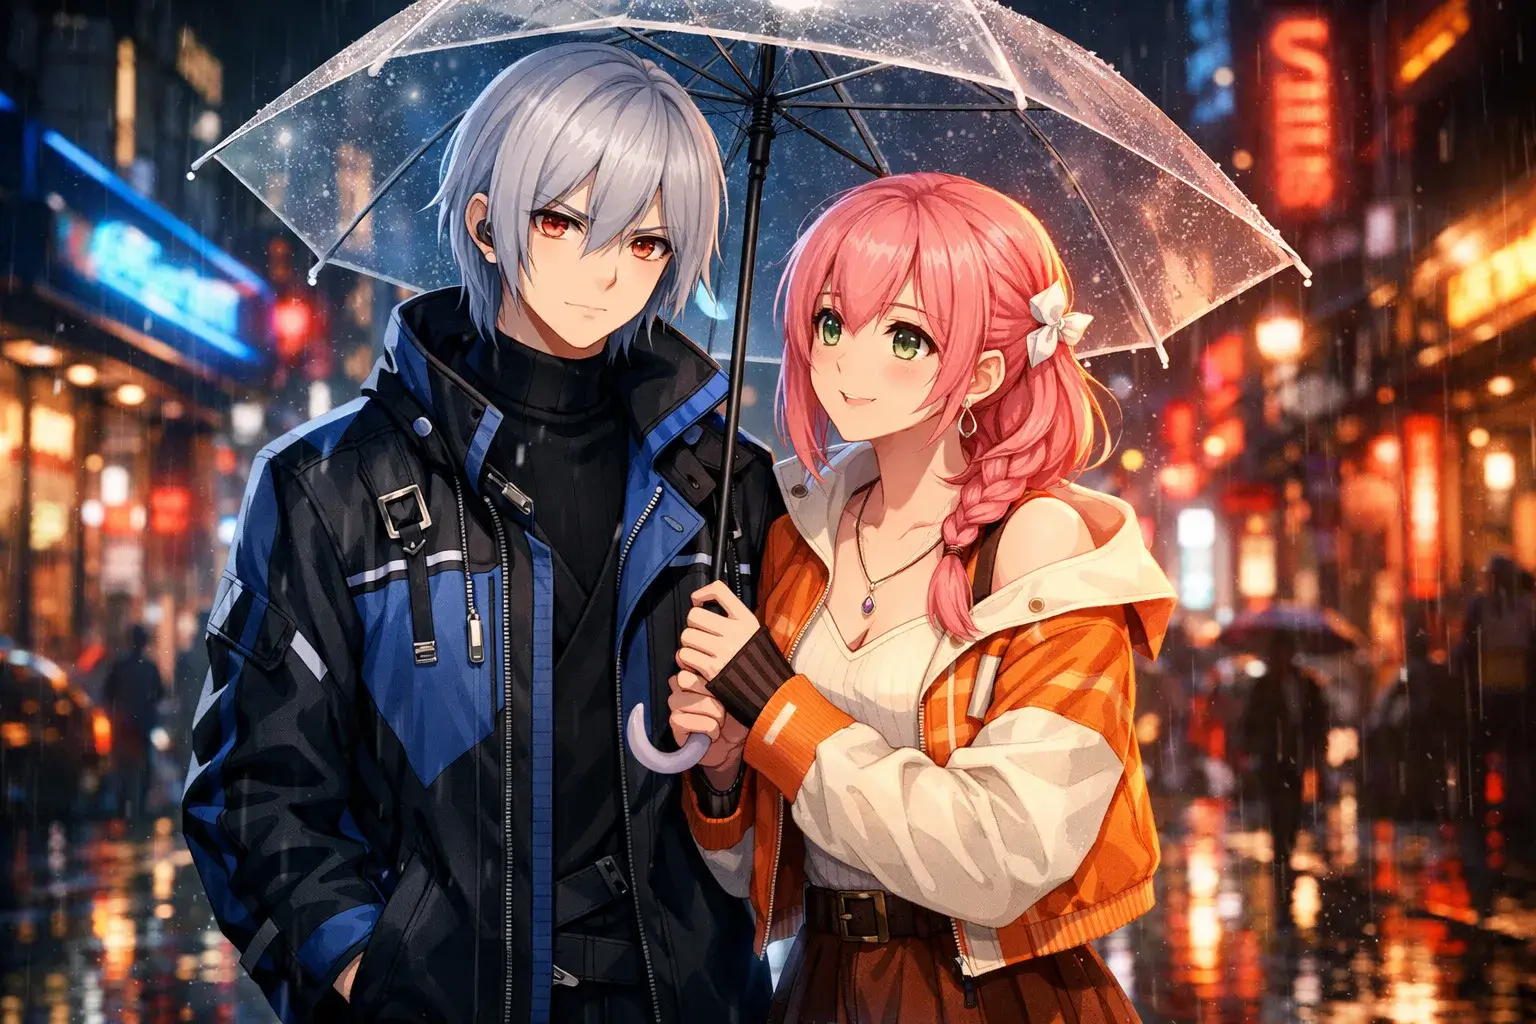
Character A and Character B sharing an umbrella in the rain, cinematic lighting, 4k.
AnividAI uses the selected OC profiles as the visual anchor for the image, helping preserve their identity, hairstyle, outfit, and overall design language in the generated keyframe.
Step 2: Move the Keyframe into the Video Workflow
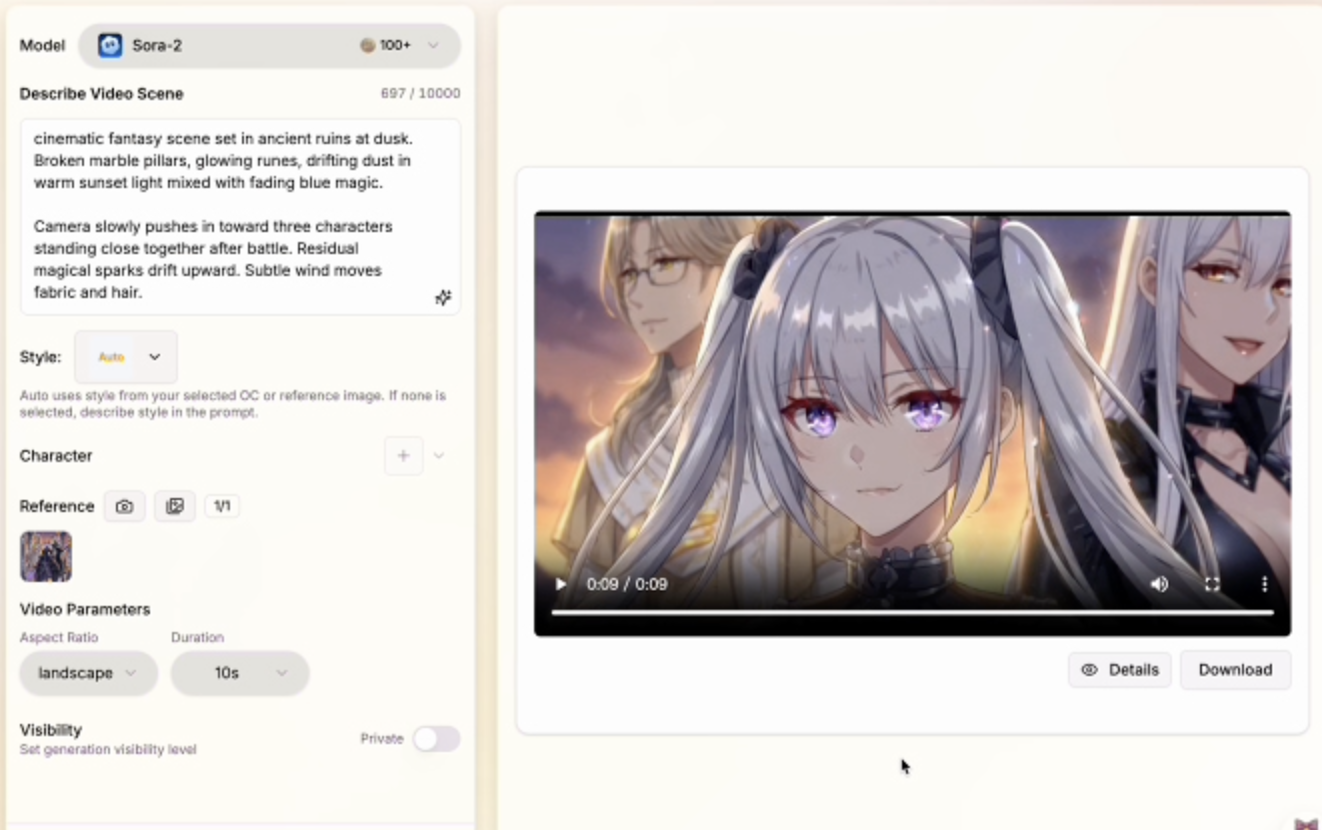
Once you get the image you like, switch to the Anime Video Generator and use that keyframe as your reference image.
- Reference Image: Your generated keyframe becomes the main visual blueprint.
- Model pairing: Use compatible video models such as Kling 3.0 or Veo 3.1.
- Motion prompt: Focus on movement, camera behavior, and emotional pacing.
Example motion prompt:
The characters walk slowly through the rain, looking at each other, soft camera zoom.
This workflow is especially useful because the video model starts from an image that already contains the correct characters in the correct relationship, which greatly reduces identity drift during animation.
Step 3: Use First and Last Frames for More Control
If you want tighter motion control, generate two images with the same selected OCs and use them as the first frame and last frame.
This helps when you want:
- a camera move between two compositions
- a change in pose without changing character identity
- a more intentional short narrative beat
For example, your first frame might show two characters standing under an umbrella, while the last frame shows them walking forward together. This gives the model a clearer motion path to follow.
Step-by-Step Full Process Demo
---Workflow 2: Kling-o1 Native OC Integration (Upcoming)
AnividAI is also preparing a deeper workflow around Kling-o1, designed to work more directly with the platform’s character system.
Instead of depending primarily on a reference image, Kling-o1 is intended to become more identity-aware by reading the visual information already stored in Character Studio.
1. Direct Visual Identity Injection
When you select multiple OCs for a Kling-o1 generation, the system can use each character’s stored visual profile as an internal identity anchor.
That means the model is not relying only on text like:
blue-haired girl, pink-haired girl, school uniforms
It can instead reference the actual saved OC identities behind those descriptions.
2. Better Multi-Character Separation
One of the biggest challenges in AI video is preventing characters from morphing into each other. Kling-o1 is designed to better preserve the distinction between multiple selected OCs, so each one can maintain separate facial features, colors, outfits, and role clarity throughout the shot.
3. Lower Reference Upload Friction
The goal of this future workflow is to reduce the need for repeated image-to-video setup. If your characters are already well-defined in Character Studio, selecting them directly in the video interface should make the creative process faster and more stable.

Best Practices for Stronger Multi-OC Results
No matter which workflow you use, the quality of your OC setup still matters. Here are the habits that improve results the most:
- Finalize your characters first: Make sure each OC has a clear, stable look in Character Studio before using them in multi-character scenes.
- Keep visual traits distinct: Strong differences in silhouette, hair color, accessories, or outfit design make separation easier.
- Write scene prompts, not appearance essays: Once characters are selected, spend your prompt budget on composition, action, mood, and camera direction.
- Start from a strong still image: If the keyframe already looks right, the video usually has a much better chance of staying on-model.
- Use shorter, cleaner motion prompts: Especially for multi-character shots, simple motion instructions often outperform overly dense prompt writing.
Conclusion
For creators building stories, duos, rivalries, or group dynamics, multi-OC consistency is the difference between a random clip and a believable animated scene.
Right now, the best path on AnividAI is the Reference-First workflow: select your saved OCs, generate a clean keyframe, and then animate from that image with the video model of your choice. As the platform evolves, the upcoming Kling-o1 integration is expected to make direct multi-OC video creation even more seamless.
If you want more stable anime storytelling with recurring characters, this is the workflow to master first.
Read More
Mastering Anime Art: The Ultimate Guide to AI Generation with AnividAI
Unlock the full potential of AI anime art! Learn how to write perfect prompts, choose the right models, and use AnividAI’s unique Character Studio to maintain perfect consistency. Whether you're a beginner or a pro, this guide will help you create stunning, professional-grade anime illustrations in seconds.
Read More
The Ultimate Guide to AnividAI: Your All-in-One AI Anime Studio for Creating OCs, Art, and Videos
Discover AnividAI - the complete AI-powered anime creation platform. Learn to create original characters (OCs), generate anime images and videos, chat with characters, and more. Features, pricing, and workflows explained.
Read More