Mastering Anime Art: The Ultimate Guide to AI Generation with AnividAI
Introduction
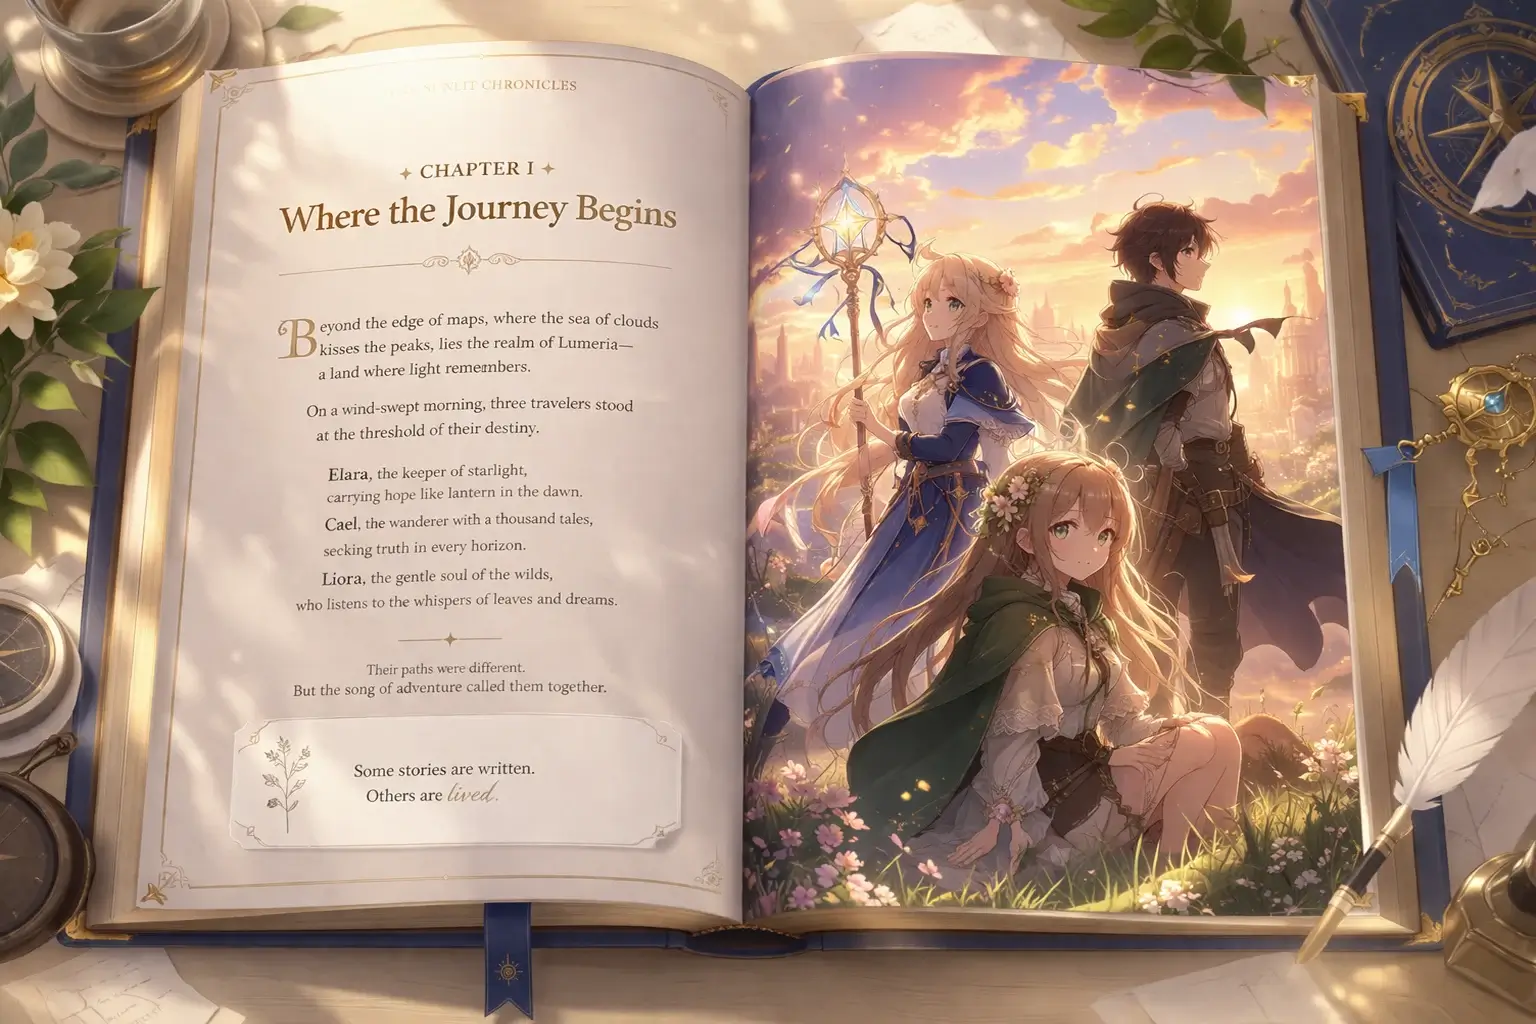
We’ve all been there: you have a magnificent anime scene in your head—a warrior standing against a neon-lit cyberpunk city, or a quiet moment in a sun-drenched classroom—but you don't have the years of drawing practice to bring it to life.
AI has changed that forever. But "generating" an image and "crafting" a masterpiece are two different things. Today, we’re going to show you how to move past random results and master the AnividAI Anime Generator to create professional-grade art every time.
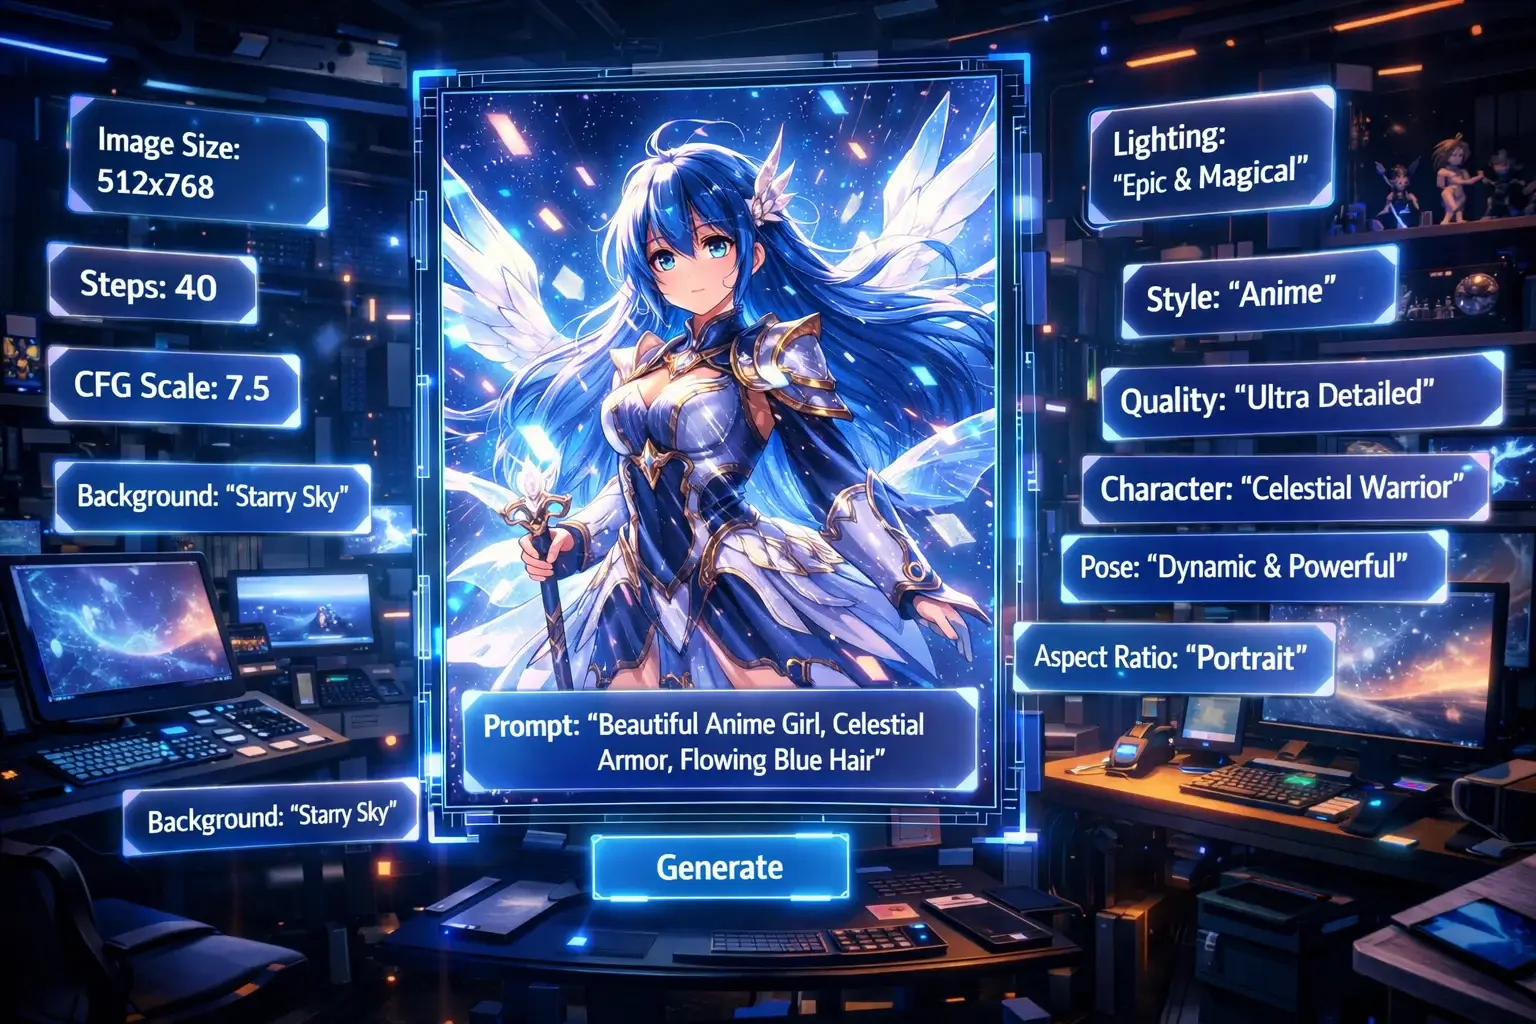
Step 1: The Anatomy of a Perfect Anime Prompt
The secret to great AI art isn't just luck; it's Prompt Engineering. On AnividAI, we use a "Prompt-First" philosophy. A pro prompt follows this structure:
[Subject] + [Action/Pose] + [Setting/Background] + [Lighting/Atmosphere] + [Style/Artist References]
- The Amateur Way: "Anime girl in the forest."
- The Pro Way: "A young priestess with long flowing white hair, standing peacefully in a mystical ancient forest, dappled sunlight filtering through giant leaves, ethereal glow, Makoto Shinkai style, 8k resolution, highly detailed."

Step 2: Choosing Your Engine (The Models)
AnividAI provides different "engines" depending on your goal. In your dashboard, you’ll see several options:
- GPT-Image-1: A strong all-rounder when your prompt is long, specific, or structurally complex. It is especially useful for multi-subject scenes, detailed composition control, and ideas where instruction-following matters more than a single preset aesthetic.
- Seedream 4.5: One of the most interesting choices for stylized anime-forward workflows. It stands out when you want strong reference-image consistency, cleaner typography, and more design-aware composition, which makes it a great fit for character sheets, key visuals, posters, and polished anime-style promotional art.
- Nano Banana series: These models are exceptionally good for fast ideation, vibrant contemporary looks, and high-output creative exploration. If you want to generate expressive character portraits, social-ready visuals, or rapidly test multiple anime directions without losing energy and color, Nano Banana is often the most exciting place to start.
- Flux 2 Pro / Flex: Still an excellent option for refined lighting, texture, and overall image polish. Rather than treating Flux as the automatic "best" for every anime prompt, think of it as a dependable high-detail engine that works particularly well when you want a more rendered, finished look.
Step 3: Using Style Presets vs. "No Presets"
One of AnividAI’s most powerful features is our Style Preset system. We’ve tuned these to recreate iconic looks like Ghibli, 3D Cartoon, or Watercolor Art.
However, if you are a power user, try the "No Presets" option.
- Why? Presets add hidden "flavor" words to your prompt. By choosing "No Presets," you get raw, direct control over the AI, allowing your specific prompt keywords to shine through without any external influence.
Pro Tip: When you select one of your OCs (Original Characters), AnividAI will often suggest switching to "No Presets" to ensure the AI focuses entirely on your character's predefined look!
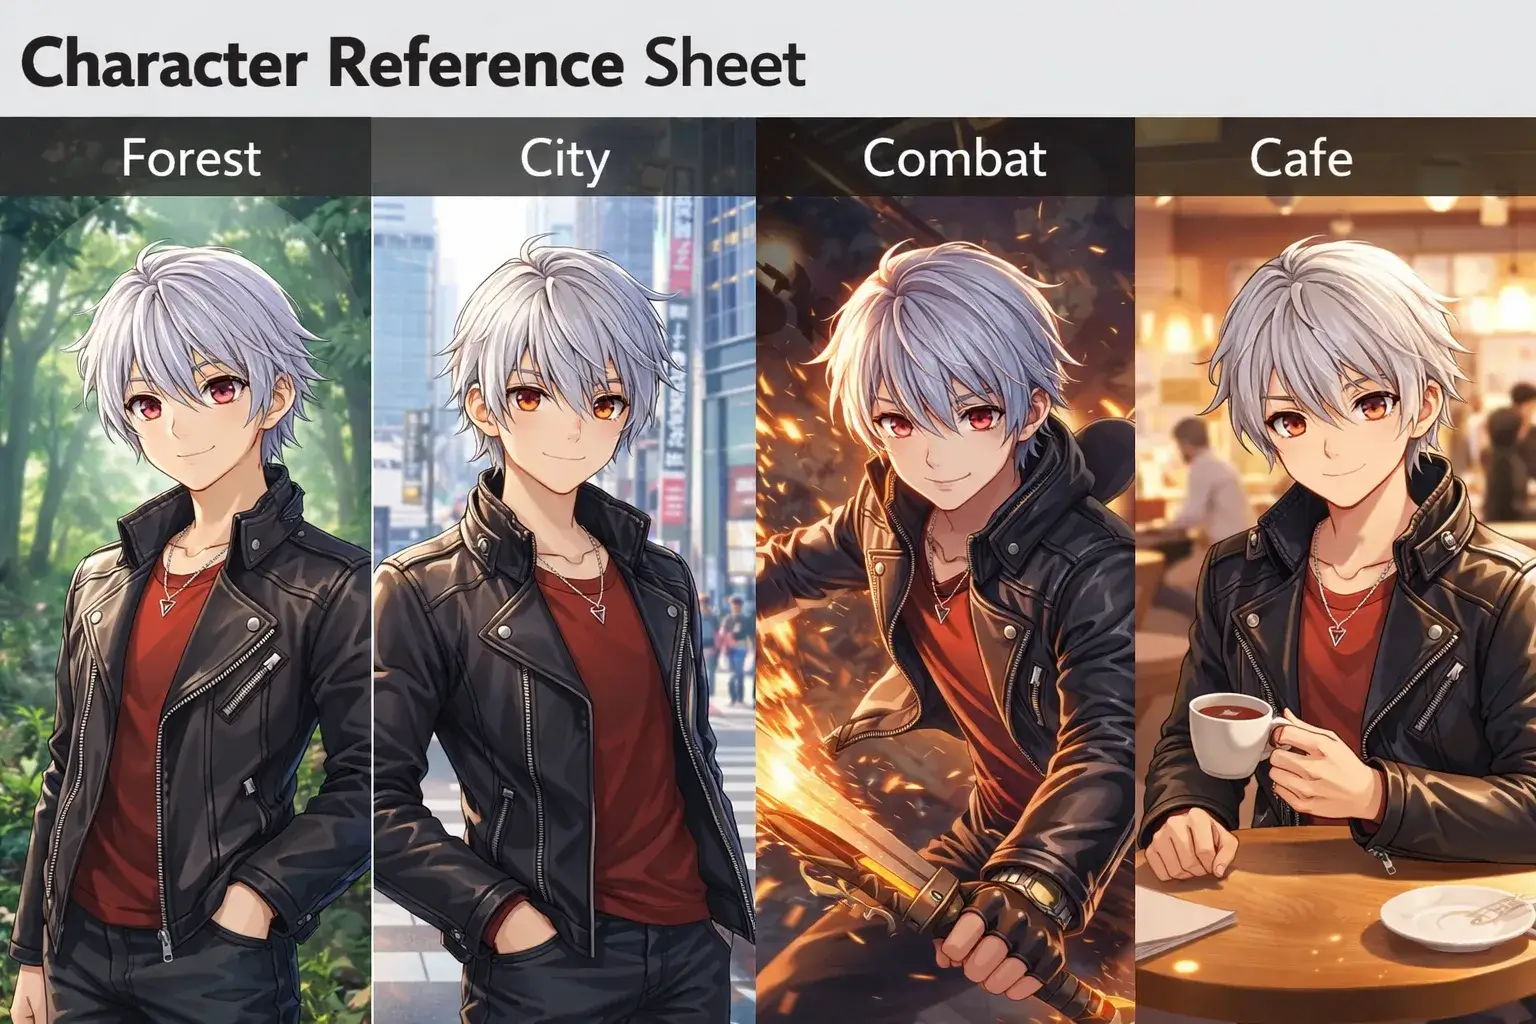
Step 4: The Game Changer — Character Consistency
The biggest problem with AI art has always been: “How do I get the same character in a different picture?”
At AnividAI, we solved this with the Character Studio. Instead of re-typing your character's description every time:
- Create your character once in the Character Studio.
- In the Anime Generator, simply select your Character from the dropdown.
- AnividAI uses that character as a Logic Anchor, ensuring the hair, eyes, and outfit remain consistent across 100 generations.
Step 5: Refining with Advanced Controls
Don't just stop at the first click. Use these tools to polish your work:
- Aspect Ratio: Use 16:9 for cinematic wallpapers, 9:16 for TikTok/Reels, and 1:1 for avatars.
- Reference Images: Have a pose or a color palette you love? Upload it as a reference image, and the AI will "borrow" that structure for your new creation.
- Upscaling: Once you find a "keeper," use our built-in Upscaler to boost the resolution to 4K for printing or high-res displays.
Conclusion: From Idea to World-Building
Generating a single image is just the beginning. With AnividAI, your art can flow seamlessly into Video Generation or become part of a Story Lab project.
The most important thing? Experiment. Try weird prompts, mix different styles, and most importantly, have fun bringing your anime world to life.
Ready to create?
Open the AnividAI Studio and start generating!
Read More

Template Gallery: Your Shortcut to Pro-Level AI Anime Art
Skip the prompt engineering! Discover how AnividAI's Template Gallery allows you to create high-quality anime images and videos in seconds. Learn to use pre-designed workflows, customize variables, and keep your characters consistent with one click.
Read More
AI Anime Video Generator: A Beginner's Complete Guide
Learn how AnividAI's AI Anime Video Generator helps you turn static illustrations into dynamic anime masterpieces, seamlessly leveraging Character Studio OCs, multi-shot modes, and high-fidelity video models.
Read More